Appearance
Unreal
A bunch of notes while I learn some unreal for a work project. Might be useful at some point...
Basics
My probably completely incorrect overview of the Unreal UI
This isn't about how UE4 works under the hood, or the game loop or any of that, just how to approach the UI when starting out.
The first intuition with unreal is to treat it like Maya or Houdini. I've come to realize that's a bad analogy, a better one is that its like Premiere. In Premiere you drag video files into a clip bin, it makes its own local fast proxies of those videos, which are assembled into a timeline of many assets.
In Unreal you drag assets (models, textures, audio etc) into the content browser, unreal makes a local fast proxy of those assets. These are assembled into a level, made of many assets.
An unreal project is really a collection of folders, where the top level 'content' folder is largely accessed and manipulated via the content browser window. Nearly all assets in the content folder are native unreal files (usually ending in .uasset), which covers models, textures, logic, materials etc. Unreal creates these automatically for you, so when you drag in an exr texture into the content browser, the exr file stays where it is, a unreal uasset texture is created in the content browser, and it has a file parameter that points back to the original exr. You can modify the original exr texture, r.click the uasset in the content browser and choose 're-import', and it will be refreshed. Like the Premiere analogy, the management of local copies of your external files is (mostly) seamless and invisible.
As well as tracking external assets, the content browser lists all the internal nodes Unreal requires like material networks, logic networks, and of course maps. Maps are more like a standard houdini or maya file.
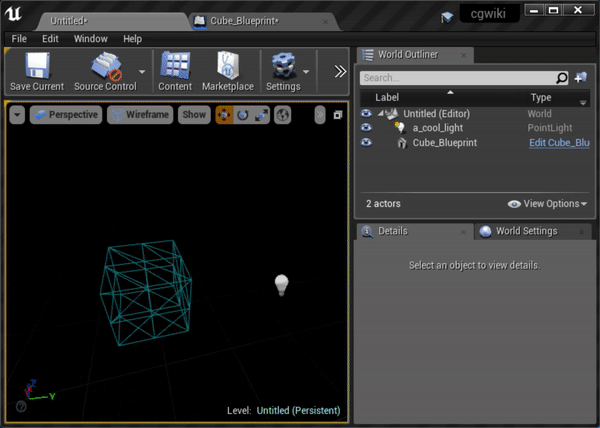
When a map is viewed, you can use the world outliner (just like the maya outliner) to see a list of assets that are within the map. Assets are dragged directly from the content browser into the viewport to add them to the level (the words 'level' and 'map' are used interchangeably in the docs and within UE4).
When things exist in a map, you can access their properties from the details panel. That can be a transform, or the asset that is assigned to it (similar to maya, the node you see in the outliner is really a high level transform, the underlying mesh/asset can be changed whenever), the material, and many other properties affecting its behavior.
The modes palette is used to access the tools, the main view is just to drag and drop primitives (cameras, lights, boxes, spheres etc), or the paint tools, foliage tools, landscape tools.
Accessing the other editors within Unreal is largely done through the content browser. Create a new material, double click it, you get the material editor. Create a blueprint node (blueprint is the visual programming language of unreal), double click it, you get the blueprint editor.
For manipulating things with a timeline, to get the closest analogy yet to premiere or a traditional 3d timeline, create a new sequenecer node, double click it, you get a timeline editor. Add tracks to control object positions, or asset parameters, set keyframes, you can then play them back over time.
Important hotkeys, navigation
While holding down any mouse button, WASD works. If you hold down the right mouse button you can then mouselook while moving, which is the most useful way to move around. While in this mode, the mousewheel will alter speed. Q and E move up and down.
g will toggle scene icons, handy when you have a million reflection capture/blueprint nodes in your scene.
F11 toggles fullscreen
Ctrl + Alt + Left Mouse Button to marquee select in the viewport
alt-v will escape the vr editor mode
ctrl-shift-t toggles the toolbar at the top of the viewport
f to frame on selected object
Hide the sphere icons
g will toggle all icons, but sometimes you need to keep some of them around, and just hide the sphere actor things that just seem to infect everything. This is especially true in the Niagara editor, where they can really get in the way when you're mixing component mesh stuff and its all hidden under giant bubbles.
Mai from SideFX gave a nice console trick, hit the tilde key (~, or the one next to the number 1 usually) and run this command:
ShowFlag.BillboardSprites 0
Tada! No more bubbles!
Quick Tips
100 quick tips
Well, almost 100. This is fried gold, I think I'll be watching this several times. All the tips I tried still work with UE5, so that's nice.
https://www.youtube.com/watch?v=zX0gilGIpRQ
Alembic from houdini to maya drops uvs
Ok not unreal, but related to the unreal stuff I'm playing with at the moment...
This happened a few times, could see in the maya script editor a complaint that the number of uvs didn't match the expected count. After some playing, it looks like a few poly faces that were passable in houdini were too broken for alembic. A clean sop to allow manifold only geo identified this. In my case it was a ngon with many sides, which i could identify and pre-triangulate with a divide sop. After that, uv's appeared in maya again.
Import fbx as full scene hierarchy
We had a scene that had been setup in maya; nicely laid out, correct pivots, names, groups etc. When imported via the content browser it'd lose all the hierarchy, bake the pivots back to the origin. If you dragged all the objects into your scene and set their translate to 0 0 0, the entire scene would be correct, but the broken pivots and no groups made it all a little useless.
Instead, from the file menu choose 'file -> import to level'. This gives you some extra options, leave them at their defaults, ue4 will spin for a bit, but it will import all the objects from your fbx, but also pull them into the current map with the correct groups and pivots.
Displacement
Our generated disp maps are too small for unreal, so they need to be run through a multiply node to boost them. 10 seems a good starting point. This goes to the 'world displacement' slot on the main material.
The material itself needs to be told to do fancy realtime tessellation, under the tessellate properties turn it to either flat or PN triangles, enable adaptive. If you flip to wireframe (alt-2 in the material preview window), you should see the triangle count go up and down as you zoom in and out. The default tessellation is a little low for my tastes, so connect a constant to the tessellation multiplier slot of the material, and boost it to say 2 or 3. Gotta be careful with this, obviously!
Cos our maps are just height, they need to be explicitly multiplied against the worldspace normals, with a VertexNormalWS node. I got that tip from here:
http://www.tharlevfx.com/unreal-4-world-position-offset/
Enabling Screen Space Reflections
Settings -> Engine Scalibility Settings -> Effects -> Cinematic
Turn off static lighting
Edit -> Project Settings -> Rendering -> Lighting -> "Allow Static Lighting", untick
Then build lighting once to disable all the lightmap warnings
Turn off Auto Exposure
Edit -> Project Settings -> Rendering -> Default Settings -> "Auto Exposure" , untick
Forward rendering and MSAA
Also in project settings (using the parm filter at the top is the easiest way to find the things, search for 'forward' and 'alias')
You have to restart for the forward renderer to kick in, and make sure to leave some time; after the restart UE4 will go and recompile every shader it needs to be forward renderer compatible, on a fairly beefy gaming laptop that takes about 5-10 mins to compile over 4000 shaders.
Promoted parameters for materials
Editing materials in unreal involves recompiling/saving each time, but its considerably longer and more irritating than a quick recompile of a houdini vop network (5 to 30 seconds is the norm).
To get around this, you create a pre-compiled material that has exposed parameters, called a material instance (the houdini analogy is promoting parameters on a vop network). Its a 3 step process unlike houdini's 1 step process.
- On your material, most input nodes (floats, vectors, textures) can be right clicked, 'convert to parameter'.
- Compile and close the material
- In the Content browser, r.click the material, 'create material instance', assign this instance to your geometry.
Now you can double click the material instance to bring up the material editor, but now you won't see the network, just a shaderball and the parameters you created, grayed out because they're at their defaults. Enable them and change their values to see the material update in realtime.
Material functions
Sort of like making an HDA for material nodes.
If you have a network of material nodes that will probably be reused across other materials, you can right click in the content browser, and from the materials menu choose material function. Cut and paste your nodes from the original material into here, save. Now you can drag the material function from the content browser into your original material, and now your original network is exposed as a single node. A lot of the existing shading nodes within UE4 have been created this way.
By default the function has a single output, but you can just copy and paste the output node, rename the parameter, and define as many outputs as you want. Any internal nodes that have been 'promoted' to parameters will still be exposed if you make a material instance of your final material.
The function won't appear in the material node list by default, but if you click in empty space within the material function, you can enable the checkbox to have it be visible.
Material parameter collection
Closest equivalent for channel referencing parameters on materials.
If you need several independent materials to have a parameter be driven from a single location, you can make a material parameter collection from the content browser. Edit it, create and name the parameters you need, save and close it. Now drag it from the content browser into your material, select the parameter you want exposed, now you can an output port on that node, that you can wire into your network.
Using the above for Vertex animation texture exports from Houdini
I had an effect that was partially driven by a material, and partially a cache from Houdini that I exported using the gamedev VAT tools. Both parts needed to play in sync within UE4, but I wanted to be able to control that with a slider, eventually hoping to keyframe that slider within the UE4 sequencer.
To do this, I created a material parameter collection, and defined a scalar value, 'dissolve'. Within the VAT shader I disconnected the initial time input, and in its place drove it from this dissolve slider, that went to a clamp to make sure it won't loop if I drive the value above 1.
In my material function I again dragged in the material parameter collection, dissolve slider, and fed that to a multiply node and add node so I could remap the 0-1 value of the slider to the range I needed.
With all that setup, I could now slide that value in the editor, and see the effect happen in the viewport.
Unreal materials vs vops cheat sheet
'Where's vector to float? Where's set component? Where's my ramp parameter?' Most are in there, but under different names, here's the ones I'm leaning on. A handy high level overview of the main shading nodes is here: https://docs.unrealengine.com/latest/INT/Engine/Rendering/Materials/ExpressionReference/index.html#expressiontypes
- BreakOutFloat3Components- A Vector-to-Floats vop. feed it a vector, it returns 3 floats. This also has a 2 float and 4 float version.
- MakeFloat3 - A float-to-vector vop. Feed it 3 floats, it constructs a vector. This also comes in a 2 and 4 flavour version.
- StaticSwitchParameter - A basic 2-way switch vop, where the true/false is exposed as a toggle when you create a material instance.
- TextureCoordinate - A uv vop
- SmoothCurve - Best equivalent to a chramp. Feed it a float, like the x coord of a texturecoordinate, and you have 2 values which control the tangents at the start and end of a 0-1 curve.

- ComponentMask - Assumes you're feeding it a vector4, lets you toggle the components to export a scalar, or vector2, vector3, or allow all the components to pass through the original vector4. Handy as a quick way to cast a vector4 to a vector3.
- OneMinus - A compliment node (took me ages to find this!)
- ConstantBiasScale - A fit range.
- Fresnel - Fresnel, obviously . End up using this a lot in materials
and some that don't have a Houdini equivalent, but sound handy:
- QualitySwitch - Something to keep an eye on for later, a multi-switch that ties into the engine low/med/high settings for controlling performance.
- Panner - Handy built in function to scroll texture coordinates with time, like doing a @uv.x+@Time in a wrangle.
- PlotFunctionOnGraph - Super handy tip from Wyeth, can use this to visualise the result of the SmoothCurve (or other properties no doubt):
- FlipBook - What you use to read from a texture atlas/mosaic/thumbnail sequence. Give it the number of sub images across/down, it will animate through them.
- Sine_Remapped - A sine function pre-remapped to a 0-1 range, but has inputs exposed to map to whatever you want.
and some bonus entries from Mickaëlle Ruckert, cheers!
- Append - curious one with no direct analogy in houdini; append 2 floats, get a vector2. Append a float to that, get a vector3. One more, vector4.
- LinearInterpolate - a lerp
- SphereMask - like doing a clamp(length(@P),0,ch('d')), but all in one handy single node.
Scripting via UnrealJS
Broadly speaking the programming options in Unreal map onto these Houdini equivalents:
| Type             | Houdini    | Unreal    |
|------------------|------------|-----------|
| Visual coding    | Vops       | Blueprint |
| Mid level coding | Vex        | ???       |
| Low level coding | Inline CPP | C++       |
| Type | Houdini | Unreal |
|------------------|------------|-----------|
| Visual coding | Vops | Blueprint |
| Mid level coding | Vex | ??? |
| Low level coding | Inline CPP | C++ |Ie, there's no artist friendly scripting language, much less an artist friendly compiled language. Epic added hooks to allow for scripting engines a while ago, and provided a Lua example which has since been abandoned. Looking for alternatives, SkookumScript looks pretty good, and python support in the editor is due soon (4.19 with any luck), but the one that caught my eye is UnrealJS.
Developed by a guy at a South Korean games company for their own projects, he's bolted Chrome's fast V8 javascript engine to UE4. For the all the hate and heat javascript gets, its close enough syntax wise to vex to be non threatening, and the browser wars mean that V8 is very fast. There's 2 youtube vids explaining how to get the basics going, and an interesting general one of how a talented javascript guy who's done a lot of the google chrome experiments has fallen into unrealJS and is doing cool things.
It's now available as a plugin directly in the unreal asset library, I've managed to make it say 'hello world' and create text that displays in game engine, but nothing beyond that yet.
- UnrealJs used like a 'processing' editor, at runtime: https://www.youtube.com/watch?v=Kl4LVaiHqGw
- Super interesting talk by Michael Chang, javascript/motion graphics/super clever guy, using unrealjs to port his webgl stuff to unreal: https://vimeo.com/165960084
Houdini to prototype blueprint
On a fast gaming laptop the material editor is still a little too slow to use interactively. The basics of it, especially in terms of texture operations, maps loosely onto vops. I've been doing experiments in vops to work out uv operations, then use what I've learned there and recreate networks in UE4. There's an irony here of using Houdini for realtime feedback on realtime shaders, because the shader editor for a realtime engine like Unreal isn't realtime enough. 😃
Fix clipped italic fonts
You can drag ttf and otf fonts into ue4 and they can be used for widgets directly. But if you want to use them in 3d via a text renderer component, you need to precompute a character spritesheet.
This is easy enough, double click the font in the content browser, set the font cache type to 'offline', find the font again (this goes through the system font dialog, so make sure the font is installed), and you'll get a sprite sheet.
But ruh roh, look what happens if you give it an italic font. The preview at the bottom shows each letter is being clipped on its right.

Adjusting the kerning doesn't help, it just spaces out the characters, but they're still clipped. If you make any changes to in the font editor, you regenerate the asset by going "Asset -> Reimport -> your font"

To fix, extend the bounding box right value by a few pixels, then compensate by setting the kerning by the opposite amount. There's still a few issues, you can see the 'V' is clipped, but it's much improved:

Finally to use this in 3d you have to render the spritesheet as a signed distance field (thats what the default text renderer material expects). Turn on the 'Use distance field Alpha' button, refresh (this'll take a bit longer), and you're good to go. As a bonus the 'V' rendering is much better:

Fast new project in UE5
Kept going for the cinematic or archviz templates, then gnashing teeth while UE5 compiled a million billion shaders.
Instead, use the vanilla game template. It seems to be precompiled out of the box, much faster to start.
Change interface font size
Via https://www.reddit.com/r/unrealengine/comments/nxwbq2/how_can_one_change_the_font_size_in_ue5/
- In Unreal Editor press Ctrl+Shift+W
- This will open “Widget Reflector”
- Now you can change value Application Scale.
Very handy for running UE5 on Linux on a VM, which for some reason defaults to huuge fonts in the UI. A scale of 0.8 seems to work well.
Not Quick Tips
Change material parameter with keypress at runtime
References
- https://docs.unrealengine.com/latest/INT/Gameplay/HowTo/SetUpInput/Blueprints/index.html
- https://answers.unrealengine.com/questions/19063/input-keypress-does-not-work.html
Summary
- Materials can't be changed without being recompiled, like vops, but many times slower
- Also like vops, you can promote parameters to avoid this recompilation, but you can't use materials directly this way
- Making a material instance of the original lets you change those parameters, but its only in the editor, not runtime
- To change material parameters at runtime, you need to create a dynamic material instance, which can only be created and assigned in code/blueprint.
Workflow
Define keypress event
- go to settings -> project settings, input section
- new axis mapping, name it
- define a key with the dropdown
- define a key to do the reverse action if needed, set its scale to -1
Make a dynamic instance material from your instanced material at runtime:
- Level blueprint, 'create dynamic material instance' function
- set dropdown to the material instance
Assign that material to your object at runtime
- Choose object, edit blueprint, construction script
- use that event to trigger a 'create dynamic material instance' function
- drag in a variable of the static mesh, use as target,
- drag out the return value to set a variable we can call from another blueprint soon
Link keypress event to parameter:
- open the event graph now for the same object
- drag in the variable you just made
- create a 'set scalar parameter value', link variable to target
- r.click, look for the name of the keypress axis event you defined earlier (should be in the menu inputs -> axis events )
- link its trigger event to the event input of the 'set scalar parameter value'
- manually type the parameter name into the purple field (there MUST be a way for this to introspect the names right?)
- set the value you want in the green field
Force this blueprint to be aware of player keyboard input
- in same graph, link an 'event begin play' to a 'enable input' function
- create a 'get player controller', feed that to the 'player controller' input
Incrementally add to the parameter when the key is pressed
- insert a 'get scalar parameter value' function in between the axis event and the 'set scalar parameter value' function, wire it up so it also read the same parameter name, and is linked to the same dynamic instance material
- create a 'float +' node to add the return value from the 'get scalar parameter value', and the axis value from the axis event
- send this value to to the 'set scalar' function
- if the increments are too big, insert a 'float x' after the input axis value, and set the second term to, say, 0.001 to slow it down.

Make widgets support clicks from gear vr
References
- https://www.youtube.com/watch?v=tgWWwiHQmzY&list=PLq4hO2RSWZ2Prw2pptcHP0dMkwpA83dqa&index=1
- https://forums.unrealengine.com/showthread.php?68472-Mobile-Touch-Swipe-Tap-amp-Dbl-Tap!-Get-it-here-for-free-)
Summary
- A widget by default watches for mouse click events
- The playercontroller needs a widgetinteraction component to provide
  those clicks
- The gearVR sends touch events, not clicks, so the playercontroller
  needs to listen for touch, and create press/release pointer key events
  to simulate clicks.
- A widget by default watches for mouse click events
- The playercontroller needs a widgetinteraction component to provide
those clicks
- The gearVR sends touch events, not clicks, so the playercontroller
needs to listen for touch, and create press/release pointer key events
to simulate clicks.Workflow
Creating a widget is covered in this guide: https://docs.unrealengine.com/latest/INT/Engine/UMG/HowTo/InWorldWidgetInteraction/index.html
To make the playercontroller listen to input, look in world settings (window -> world settings), and find the playercontroller entry that's assigned. If you have a custom one already that can be edited, great, edit it, otherwise make a new playercontroller blueprint in the content browser, and assign to the world settings.
Edit the playercontroller blueprint, make sure the component tab is visible (window -> components), add a widgetinteraction component.
Edit the event graph for the playercontroller blueprint, add an 'Input Touch' event. Annoyingly this is hidden in the r.click menu, and also mislabelled. Turn off context sensitive, and search for 'touch', its the last entry in the 'input touch' subfolder.
Use its pressed and released events to drive a 'press pointer key' and a 'release pointer key' node respectively, with the key set to 'left mouse button'. Control-drag in the widget interaction variable, and wire that up as the target. To make it easier to test on the desktop, you can bind a regular keyboard key to also drive the press and release pointer key functions.

Click the 'class defaults' button at the top, find the input section towards the bottom of the details view, and set "auto receive inputs" option to 'player 0', so it will listen to touch and keyboard events.

Now select the widget interaction component in the top-right component view, and on its details panel set the interaction distance to what you need, and set the interaction source to 'center screen'.

With all that done, you should be able to go back to the widget and its event graph blueprint, and add an 'on pressed (button 1)' event to drive behaviour, and it should all work.

Button 'calls', other things 'bind' to call via event dispatch

I have a widget button, I want something else to react when the button is pressed.
The base tech is event dispatch, covered very well here:
https://forums.unrealengine.com/showthread.php?100929-Event-Dispatchers-explained-Finally-!
The main problem is on the recieving end, you need to know the name of what you're listening to. In most examples this is the player itself, or the level, or a collision that gives you the name of the thing colliding, but in my case I couldn't find a clear way to get the name of the button (a widget blueprint).
This was complicated by the fact that with a widget, you have the 'actor', which is essentially the transform, and it contains a reference to a widget, which is the button, and it in turn makes refrence to the widget class, which is the blueprint code.
I naively thought 'aha, I'll just embed the name of the widget blueprint in the dispatch event, and the listener can extract it directly from there', but in hindsight that'll never work. The listener needs to bind itself to the eventdispatch, to do that it needs a target, ie the name of something that's calling. My logic means that it listens to the dispatch to get the name, but without the name it can't listen to the dispatch. Catch-22!
Instead, I found I had to brute force it, so on the beginplay event, find all actors that are widgets, loop through each one, get its widget component, get the explicit blueprint widget, and thats the name to use as the target. I'm sure this'll fail spectacularly later, but for now, it works.
Making a 360 panorama stills viewer with hotspots
Overview
Blathery notes, refine later....
So the idea was similar to old myst games; have a bunch of panos that are linked together, than you can click through with hotspot zones. I'd planned to generate these by loading up a big environment set in Houdini/Maya, bring in a panorama camera, and walk through the set, rendering an image wherever I felt it was interesting. How to load this in Unreal?
The end technique is super lazy. In Unreal I make a sphere, scale it up, and drag the first image texture onto it. If you snap the camera to the center of the sphere, and rotate around that point, you're viewing the pano in all its pano glory. I then copy/paste the sphere, drag the second image onto it, and then translate it to where its meant to be. If you keep the camera at the first position, and observe the outline of the second sphere as you move, you can see where the relative hotspot will be.
Do this for all the images, dragging on textures, placing spheres, eventually you have all your pano spheres laid out. Neato. Thinking out loud, it'd be wise to record the camera positions as nulls, export fbx, and bring them directly into Unreal, saving any eyeballing or boring drudge work. Hmm.
The game logic is pretty simple. Here's some magical pseudocode:
- On game start, snap the camera to the first sphere
- On every game tick:
  - Trace a ray from the camera, getting a list of the objects it
    intersects
  - If there's more than one object:
    - Display a hotspot to show we can click in this direction
    - If the user clicks:
      - Get the second object (the first is the sphere we're currently
        in, so ignore that)
      - If its a sphere:
        - Get its transform
        - Fade the screen to black
        - Teleport the player to that next transform
        - Fade up
  - If there's not more than one object:
    - Hide the hotspot to show there's nothing to click in this
      direction
- On game start, snap the camera to the first sphere
- On every game tick:
- Trace a ray from the camera, getting a list of the objects it
intersects
- If there's more than one object:
- Display a hotspot to show we can click in this direction
- If the user clicks:
- Get the second object (the first is the sphere we're currently
in, so ignore that)
- If its a sphere:
- Get its transform
- Fade the screen to black
- Teleport the player to that next transform
- Fade up
- If there's not more than one object:
- Hide the hotspot to show there's nothing to click in this
directionThat's the core idea. Means I don't have to track buttons per state, or drive it from a spreadsheet, or do any book-keeping; if there's a line of sight from one sphere to the next, you can click in that direction. The reason I test that the second object is a sphere is to allow me to put up blockers; I can create walls and such between the spheres, so if the ray test hits that, it stops the rest of the logic.
Blueprint code
Behold!

White wires are events, they show how excecution flows. A handy feature is you can hit play in the editor, and click stuff, do things, and the wires will glow to show you how events are being triggered and control flow is being altered. Blue lines are object references, yellow are transforms, red are booleans, pink are strings, green are floats.
Breaking this down:
Begin play

Unreal uses events for most of its behaviour triggering. Pressing the 't' key is an event, clicking the mouse, tilting your gamepad, or in this case, the event is simply 'begin play'. The aim here is to snap the camera to the first sphere, so when play begins, I get a list of all the 'actors' that are static meshes (ie, all the spheres), then do a for each loop to iterate through them. In the loop I match their name to the one I'm after, in this case anything ending in "001". I then get the camera player manager, and the transform of the first sphere, and snap the player to that location.
What was interesting the first time was that there's several things that are identified as 'the player', took a few goes to work out the right one. There's the player controller, the player pawn, and the camera. Still getting my head around it all, but skimming a few QnA's on stackoverflow implies that a player controller is the 'brain' of the player, where the logic goes, all that stuff. The 'pawn' is the physical entity in the level, which you can think of as being puppeteered by the player controller. Another way to think of the distinction is if you were playing a first person shooter, a player could die and restart many times over; each time the pawn is disengaged and a new one is made elsewhere, but the player controller stays persistent.
In this case I link to the camera player manager. Why? Trial and error. I found curious behaviour when using the others, which implies more a failing of logic on my part than Unreal I think; if I used the controller then I'd inherit translation and not rotation. If I used the pawn, the reverse. Using the player camera worked as expected.

The extra bit here is to parent a sphere to the camera. This is an unlit, slightly transparent blue sphere, which in the default settings is parented with offset so its down the axis of the camera, about 500 units away. This is what I use for the hotspot indicator, and I toggle its visibility later on.
Game tick

So this is what happens on every frame update of the game, there's probably more efficient ways of doing this, but for this simple setup, its not too much of a problem.
First I grab the camera, get its position, get its forward vector, and construct another position along this vector, many units away. Its this sort of stuff that makes me wish blueprint had the equivalent of a vex wrangle. Still, works.

This is a little example of printing stuff to the screen, and constructing strings. Again, the lack of a text field to just construct strings is irritating, but this works well enough. Note the unlabelled casting nodes; blueprint sets up a lot of that stuff for you when connecting almost but not quite similar things. Because blueprint networks are context free, there's an incredible amount of node types, too many to comfortably browse through by default. As such, the selection-aware preselect of the node menu is very handy. Drag from the output of a node, let go, and you get a reduced list that just pertains to that type of output. This also works for inputs, so you can drag out from an input, and get a similar reduced menu. And finally, you can connect an output of one node to an input of another, and if they can be connected via a type conversion, that'll be made for you too.
Project 360 latlong through a light

Download plugin package: equirect_light.zip
A way to project a latlong/equirect image through a point light. Uses a material as a light function, and cheats all the theta/phi stuff with a 'light vector' node. Goes:
light_vector -> latlong_to_uv -> texture -> mask (as parameter) -> emissive_color
Using textures in lights assumes its an IES profile, ie, its black and white. As such you need to do the trick of splitting the texture into R G B, make 3 lights that are also R G B, and assign the 3 material instances to each light.
Use the funky new(ish) video texture stuff, find yourself a 360 video, plug it into the light material, you have yourself a 360 video player you can project over your scene. Fun!
Create a content plugin
Handy tip from funk lord Wyeth Johnson.
Say you wanna share some stuff (like the 360 light above), and want to wrap it up in a self contained package. You can create a plugin, move or copy the stuff over to the new content folder that's made, package it, send. The person receiving it puts the plugin in their project, on start Unreal will detect the plugin and make it available.
- Go to edit -> plugins
- Create new plugin in the lower right
- Name it. If the 'create' button is grayed out, click on the main center section of the UI (away from where you set the name), the button should activate, click it.
- In the plugin browser, enable the folder view on the left, and use the view options in the lower right to ensure 'show plugin content' is enabled. You should now see a folder for your plugin.
- Drag and drop what you need into that folder (you'll be asked if you want to move or copy, take your pick), or create new stuff in there, whatever you need.
- Save the project! Until you do this, none of the assets you moved/copied/created exist.
- Back to the edit -> plugins menu, find your plugin (right at the bottom of the list), click 'package' in the lower right. It will ask you for a parent folder location, and make a self contained folder of stuff.
- Send that folder to someone else.
Load a content plugin
So you've just received a content plugin from someone else. Here's how you load it.
- Create a 'Plugins' folder in your project (alongside where the Content folder, .uproject file is located)
- Put the plugin folder you received in there
- start/restart Unreal
- It will warn them a new plugin was detected, enable it, now it will be available in the content browser.
- You probably won't see this by default though! You need to enable the side bar on your content browser with the little icon in the top left, then using the 'view options' menu in the lower right turn on 'show plugin content'
- Now you can browse to that top level folder, and see the tasty stuff inside.
Look at the VR camera
'get player camera manager' will be hidden if you have the 'context only' option enabled, tricky that.
Parent things to the hand controllers
https://answers.unrealengine.com/questions/324995/get-hand-position-is-not-returning-correctly.html
use the cryptically named 'get hand controller and orientation', but also add the vrorigin from the vrpawn, or its offset by your physical height off the ground, dur.
General blueprint musings
Blueprints tend to belong with the content browser version of a 'thing', rather than the in-the-level copy of a thing. Daring to reference OO terms from my failed 1st year uni computer classes, blueprints stick with the object definition rather than the instance.
This also means that cos you're working in the object definition, you can't just get references to things in the level, as the blueprint isn't aware of them (again, the dumb analogy is that the blueprint 'lives' in the content browser, while stuff you're interested in is over in the world outliner).
So, if blueprint can't immediately get to things in the level, how can you get to things in the level? 2 ways: Functions and Variables.
Functions: Blueprint has quite a few functions that list things in the level, one I've used a lot is 'get all actors of type..'. This creates an array, which you can run through a for each loop to filter down to the thing(s) you need. It's implied of course that you don't want to be doing this loads, so ideally limited to a constructor script or a Begin Play, not on every game tick (though I recall reading somewhere that there are some highly optimised get-all-actors-of-blah functions that run pretty quickly).
Variable: Like promoting parameters on an HDA, you can create a variable in your blueprint, make it public, and it gets exposed as an extra control on your object in the level editor. Also like HDAs, variables can be a simple float slider, or an object reference. So you create a variable of type actor (or get super specific with all the fancy actor types like pawns and foo instance blah blah), make it 'settable' by clicking the eye icon next to the name, and then drag in a 'get' copy of that variable into your blueprint, treating it as if its the thing you're interested in. When you have your blueprint-logic thing in your level, when you select it you'll see a variable listed in it's details parameter. You can now select it and point it to another object in your level, and the script should work as expected.
In this gif I setup exactly that; I have a cube and a light, and I want the cube to be able to find the light. I create a variable in the cube blueprint, make it public, set its type to a point light actor, and 'get' it, and feed it to the print statement to report the name of the thing it found. After the script is compiled, the cube in the level editor has a new parameter which is an object slot. I point that at the light, play the level, and see that it finds the light as I expect.
Python
Python is now included by default in UE5, and has been 99% supported in UE4.2x for a while. While it's not as pythonic as you'd like, its definitely good enough to get stuff done, save a lot of irritating manual labour time.
Main docs are here:
https://docs.unrealengine.com/5.0/en-US/PythonAPI/
Broadly speaking it feels like the ol' Maya python days; most things are accessed via strings, the attempt to wrap up native UE classes into elegant python equivalents is... er.. minimal... but hey, better than nothing.
If you bring up the output log, you can click where it says 'CMD' at the bottom and swap it to Python (REPL). The difference between Python and Python REPL is the latter is more of an interactive console, so output will go to the log window without requiring you to wrap everything in print() calls.
That reminds me, it defaults to python3, so yes, print('foo') everywhere please, none of that old fashioned print 'foo'.
Handy quick things
Stuff in the content browser or level are treated in python as a UE Object of type whatever. You can get an object reference directly from a string path:
asset = unreal.find_asset('/Game/SubwayTrain/Media/NewlevelSequence')
If you're lazy you can r.click a thing in the content browser and select 'Copy Reference', then paste it into the python editor (you'll need to remove the prefix, and optionally the suffix).
Or get a list of object(s) the user has selected in the content browser:
assets = unreal.EditorUtilityLibrary.get_selected_assets()
...and get the path from that list:
asset = assets[0].get_path_name()
To set properties on an object you use a generic set_editor_property function by parameter name and value. Various docs and videos mention that while certain objects will have 'nice' python style functions to set properties directly, they won't trigger an update to the rest of the UI. Set_editor_property will trigger a cook, so that's the preferred method:
asset.set_editor_property('myparameter', 12)
Most things just accept floats, strings, integers, an exception is the image media source path, which expects a directory and requires a wrapper:
my_img_sequence.set_editor_property('sequence_path', unreal.DirectoryPath('C:/myseq'))
Note that you won't see this update straight away, in my case where I'm using it in a level sequence, I had to scrub for a bit until the viewport refreshed.
To delete things in the content browser directly:
unreal.EditorAssetLibrary.delete_asset('/Game/MI_deleteme')
The paths module has a bunch of stuff for project and install specific paths, eg the project folder:
projdir = unreal.Paths.project_dir()
UE makes you jump through hoops a bit to get to stuff in the level by name. Rather than fight it, I've taken to just getting an array of all actors in the level, and then filtering:
all_actors = unreal.EditorLevelLibrary.get_all_level_actors()usdactor = [x for x in all_actors if 'UsdStageActor' in x.get_name()][0]
Not unreal specific, but putting it here because python 3 changed how reload works, and I keep forgetting, and I have to keep reloading modules while debugging...
import importlibimportlib.reload(mymodule)
Editor Utility Widget
You can create panels designed to run in the editor for your artists. Create an editor utility widget, you're presented with a UI creator. Make buttons, text fields etc, then flip to the graph view to assign logic.
The handy thing here is you get python specific blueprints, similar to python sops or wrangles. Execute Python Script lets you wire up both inputs and outputs, great way to do validation, all the stuff python is good at, but also talk to the rest of the blueprint universe.
To actually load the panel, r.click it in the content browser and choose 'Run Editor Utility Widget' at the top of the menu.
Matt Lake has recorded some great quick overviews of how to get this all going: https://www.youtube.com/c/MattLakeTA/videos
Native Pyside2 UI with Unreal
Surprisingly while the Editor Utility Widget (EUW) stuff is pretty good, the tooling around tools themselves isn't. You'd want to control the code behind any EUW from a central location, have them be bootstrapped into new projects. As of June 2022 the python api doesn't allow for blueprint node creating or wiring, so the only way to push an EUW into a project is to manually copy .uassets around, not great.
For that reason we looked into creating UI's with native Pyside, and have them interface with Unreal.
This seemed like a great tutorial, even if it was a couple of years old, and the Puzzle Bobble music bed is a tad annoying. 😉
https://www.youtube.com/watch?v=Zzg55io1aQg
Unfortunately I ran into problems out of the gate; pip on my machine refused to install PySide. PySide2 was fine, so went with that.
This being my first foray into PySide, I assumed the code would work the same between v1 and v2, but no, the modules have been reorganised juuust enough to be annoying. The main beefs were that most of the things in QtGUI are now found under QtWidgets, and Qt Designer is well hidden. Following the Qt website it implies you should install Qt Design Studio, but that's not compatible with QUiLoader. Turns out that the vanilla Qt install includes designer, but it's not added to the Windows Start menu. I found it under
C:\Qt\Tools\QtDesignStudio\qt6_design_studio_reduced_version\bin\designer.exe
Beyond that it all worked as shown in the video tutorial; 'import unreal' works, you can access information about the project, push stuff to and from the PySide2 UI, nice.
Add Custom Menu and make it run on startup
Clues from here:
https://forums.unrealengine.com/t/making-menus-in-py/144498/5
Here's the core of it, with slight tweaks required for UE5. Note the awful one-liner in there! I was being lazy and just had my python code sitting at the top level of my project folder. Don't do what I do, put it in in <project>/Content/Python, it'll be added to the python paths, avoiding such hacks.
python
menus = unreal.ToolMenus.get()
main_menu = menus.find_menu("LevelEditor.MainMenu")
if not main_menu:
    print('main menu not found')

entry = unreal.ToolMenuEntry(
    name="Python.Tools",
    type=unreal.MultiBlockType.MENU_ENTRY,
    insert_position=unreal.ToolMenuInsert("", unreal.ToolMenuInsertType.FIRST)
)

entry.set_label("Do Cool Stuff")
entry.set_tool_tip("This menu entry does amazingly cool things")
entry.set_string_command(unreal.ToolMenuStringCommandType.PYTHON, unreal.Name(""),string=("import sys; import importlib; sys.path.append(unreal.Paths.project_dir()); import coolstuff;importlib.reload(coolstuff);coolstuff.main()"))

script_menu = main_menu.add_sub_menu(main_menu.get_name(), "PythonTools", "Blah", "MyCustomMenu")

script_menu.add_menu_entry("Scripts", entry)
menus.refresh_all_widgets()
menus = unreal.ToolMenus.get()
main_menu = menus.find_menu("LevelEditor.MainMenu")
if not main_menu:
print('main menu not found')
entry = unreal.ToolMenuEntry(
name="Python.Tools",
type=unreal.MultiBlockType.MENU_ENTRY,
insert_position=unreal.ToolMenuInsert("", unreal.ToolMenuInsertType.FIRST)
)
entry.set_label("Do Cool Stuff")
entry.set_tool_tip("This menu entry does amazingly cool things")
entry.set_string_command(unreal.ToolMenuStringCommandType.PYTHON, unreal.Name(""),string=("import sys; import importlib; sys.path.append(unreal.Paths.project_dir()); import coolstuff;importlib.reload(coolstuff);coolstuff.main()"))
script_menu = main_menu.add_sub_menu(main_menu.get_name(), "PythonTools", "Blah", "MyCustomMenu")
script_menu.add_menu_entry("Scripts", entry)
menus.refresh_all_widgets()For this to run every time, you can dive into project settings, search for python, add an entry to startup scripts, and add your module in there.

USD
It's early days, but already its possible to get some quite nice workflows. Setup your USD properly in Houdini with Lops, and you can get models, animation, materials with textures and shader properties, instances, cameras, lights, all pull in at once. As always, Ben Skinner was out blazing a trail here, with Dave Brown a very close second, I'm just writing stuff down.
But before you get too excited, here's stuff to be wary of (as of 4.26 anyway):
- Animated changing topology won't work, so no flip sims. Feels like an oversight more than a hard limitiation, as the alembic importer can handle this.
- Default cameras come in with too much defocus, but that's a USD/Lops default issue more than Unreal. Make sure you set the focus to something sane before exporting to Unreal.
- Camera framing is often incorrect, and needs futzing with the filmback size
- No volumes (obviously)
- USD cameras get their transforms ruined if you dare touch them. Sometimes you can fix by reloading the USD, other times I've had to just restart Unreal completely. Don't nudge your cameras!
USD and Sequencer
USD animation is exposed in Unreal as a sequencer clip, but you won't find it in the content browser. It's semi-hidden on the top node in the world outliner, the UsdStageActor. Select it, and in its parameters you'll find a sequencer parameter near the top that looks grayed out. Double click it, that'll send it over to sequencer, and your animation is now available.
USD and render movie queue
The render movie queue expects to be able to modify the sequencer tracks, but it can't do this with the internal sequencer provided by USD. The workaround we've found is to load the USD sequencer, then click the wrench icon and 'save as', so it becomes a vanilla sequencer in your content browser.
USD and parenting cameras
The above allows for this trick; movie render queue often can't find the camera within the usd file, so the other workaround is after you've saved the sequencer seperately, create a new camera, parent it under the USD camera, reset its transforms. Now drag that camera into your sequencer, this will make a camera cut track, which the movie render queue will understand.