Appearance
Experiments
These are quick tests, often answers to forum posts, that one day I'll try and sort into proper categories (but probably won't).
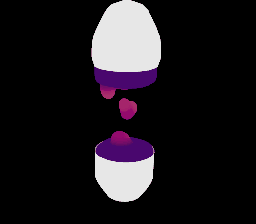
Occlusion Vop Sop
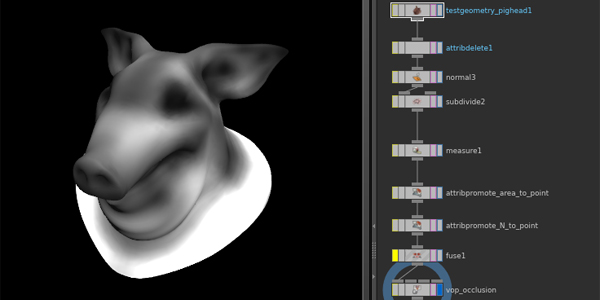 Download scene: occlusion_vop_wip_v02.hipnc
Surprised to see there's no definitive answer for this (occlusion sop) either within houdini or on odforce; an odforce search turns up various answers about writing out point clouds, c++, bit slow, avoid, etc. My super low-brow understanding of how point-based occlusion works in prman made me think there should be a simple(ish) vop network to do this.
edit: Actually there's a thread on doing it here ( http://forums.odforce.net/topic/20792-learning-vopsop/page-10?hl=vops#entry124867 ), but I'm trying very hard to not look at the examples, and work it out myself! 😃
The result isn't correct, but it's interesting. Density map? Curvature map? Not sure.
Anyway, here's the idea:
- Use measure sop to calculate area per primitive promote that to point
- Vop network that runs this loop per point:
- Get the nearest n points within a certain distance
- Loop over each found point and get its position, area, normal
- accumulate the distance * area * dot product of this points normal vs the found points normal
- output the final result and scale/gamma to taste
By accumulating the distance, near points should occlude more, far points occlude less. Except already I can see I have my logic wrong, my code should be reversed, damnit. Anyway, scale that by the area, again, bigger primitives occlude more, smaller less. Finally compare normal; the idea that prims that face each other get maximum occlusion, but perpendicular ones get none (eg,a point that has a polygon above it, edge-on, shouldn't occlude.... right?)
Like I said, the result isn't correct, but feels like it has potential. Hmm.
This uses 'nearpoints' and a loop, I'm sure pcfilter could be used instead to get the result even faster and lazier. Can't work it out though. And yes, of course I could just use a mantra occlusion shader and bake it, but where's the fun in that?
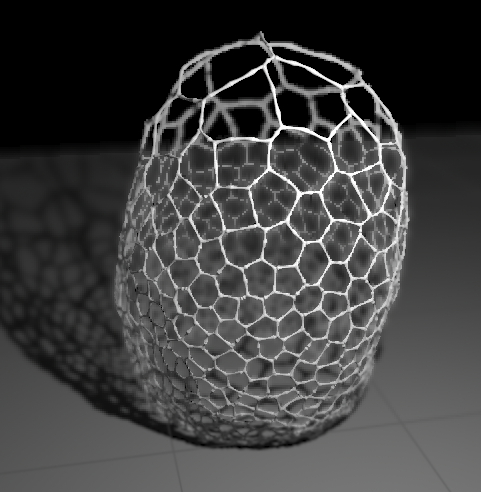
Second attempt
This looks better!
 Download scene: vex_ao.hip
This logic makes a little more sense; for each point, get a random ray direction within a cone (using the normal as the center of the cone), use intersect() to trace a ray out from that point along the ray. If it hits something, darken the point, if it doesn't hit something, ignore. The intserect() call can return all sorts of interesting info about the point it hit, which is a shame as I immediately throw away all that info, and just record if it hit something or not.
After about an hour of swearing at it, realised why it wasn't working; you need to add a little offset to the source point, otherwise intersect just hits the prim the point belongs to, and everything is occluded. That's the @P+(raydir*.001) bit in the intersect call.
vex
vector hit, raydir;
float u, v, conewidth;
int hitprim;
@Cd = 1;

float maxdist = ch('maxdist');
conewidth = radians(ch('conewidth'));
int rays = chi('rays');

for (int i = 0; i<rays; i++ ) {
    raydir = sample_direction_cone(@N*maxdist,conewidth,vector2(rand(@Time+i)));
    hitprim = intersect(0,@P+(raydir*0.01), raydir, hit, u, v);
    if (hitprim==-1) {
      @Cd *= 1;
    } else {
      @Cd*=1-(1/float(rays));
    }

}

@Cd = pow(@Cd, ch('gamma'));
vector hit, raydir;
float u, v, conewidth;
int hitprim;
@Cd = 1;
float maxdist = ch('maxdist');
conewidth = radians(ch('conewidth'));
int rays = chi('rays');
for (int i = 0; i<rays; i++ ) {
raydir = sample_direction_cone(@N*maxdist,conewidth,vector2(rand(@Time+i)));
hitprim = intersect(0,@P+(raydir*0.01), raydir, hit, u, v);
if (hitprim==-1) {
@Cd *= 1;
} else {
@Cd*=1-(1/float(rays));
}
}
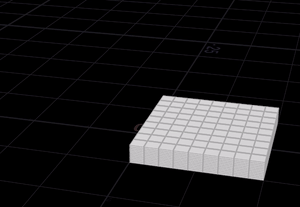
@Cd = pow(@Cd, ch('gamma'));Generic rolling cubes
 Download scene: generic_rolling_cubes_wip_v01.hipnc
An extension of the 'cubes marching' example on the Houdini#Cubes_marching page, but modified so that that the cubes can roll over arbitrary surfaces.
It's close, but needs some work to make it proper sexy. I got lazy and used a 'find shortest path' sop to generate a path, but spent more time cleaning it up than on the actual effect. Anyway, getting clean normals for the system to work with is a chore, I had to do some manual editing to get them consistent.
The idea is if the path has well defined normals, we can use that to drive the lift-off-surface part, as well as the rotation axis (the rotation axis is cross(@v,@N) rather than cross(@v,{0,1,0}). You can see it gets a little twitchy on abrupt direction changes, feels like there should be a clean way to drive it. Parking it for now.
Misc
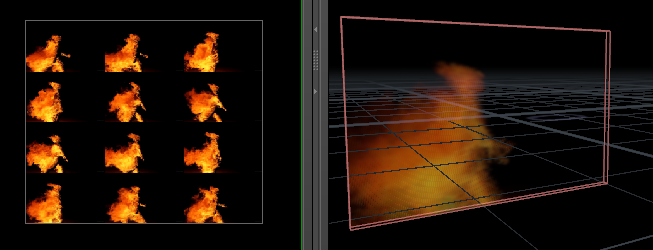
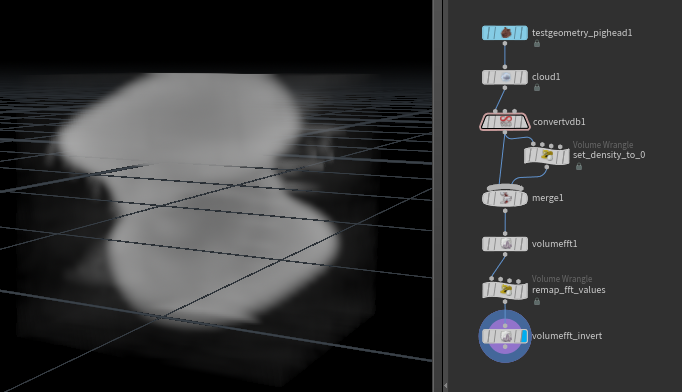
Clouds
 - clouds_v04.hipnc - fluffy
 - clouds_v05.hipnc - toned down displacement, much finer vdbtoparticles resolution
Carve without carve

Normals
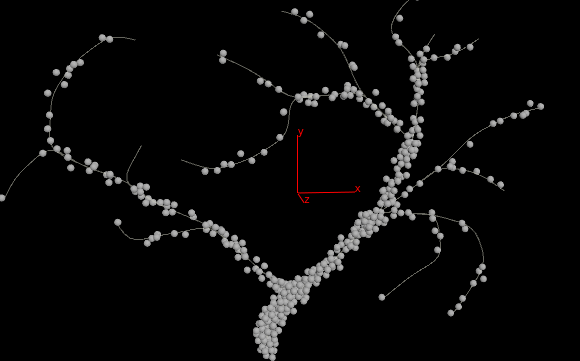
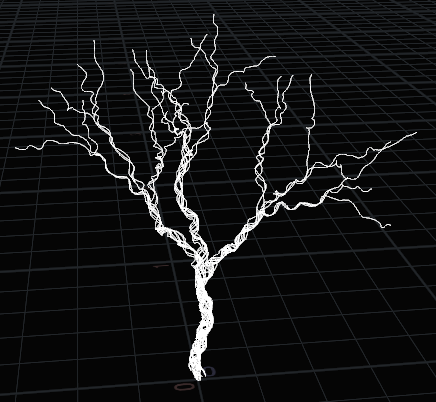
Points down veins
 Download scene: points_down_veins.hip
Grains fail: points_down_veins_grains.hip
Take 2, with pop attract and grains:
 Download scene: points_down_veins_grains_v02.hip
 Take 3, using toadstorms wiser method to create paths from single tree structure with 'find shortest paths' sop. Download scene: points_down_veins_grains_v03.hip
Take 4. Classic itch I can't help but scratch...
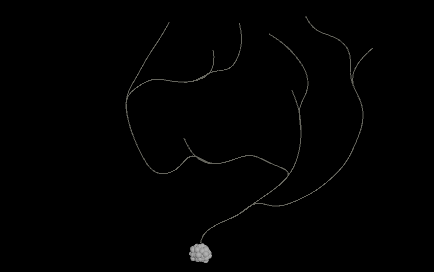 Download scene: points_down_veins_grains_v04.hip
Stroke in houdini
 Download scene: stroke_v01.hipnc
Bow vectors
 Download scene: bow_vectors.hipnc
Subdivide on one axis
 Download scene: subdiv_on_z.hipnc
Rivets
Download scene: rivetting.hipnc
Download scene: rivets_fix.hipnc
Recursive copy with for loop
 Download scene: fern_grow.hip
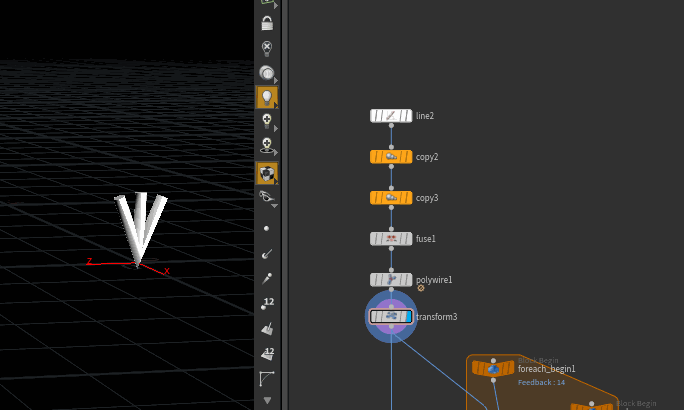
Rope weave
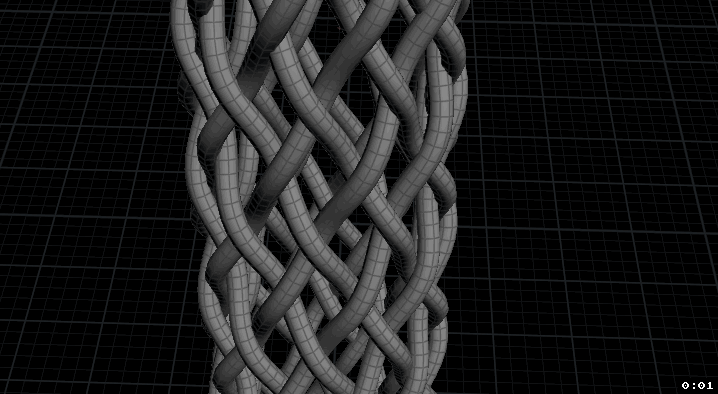 Download scene: rope_weave.hip
Volume deform on curve
 Download scene: volume_path_deform.hipnc
Pscale to colour
Download scene: pscale_in_shader.hip
Download scene: pscale_in_shader_v02.hip
Download scene: pscale_in_shader_packed.hip
Sweep with twist and scale control
 Download scene: sweep_twist_v02.hipnc
Struts
 Download scene: struts.hip
Pop droplets
Download scene: :<File:Running> Droplets_me_v02.hip
Display binary numbers in a font sop
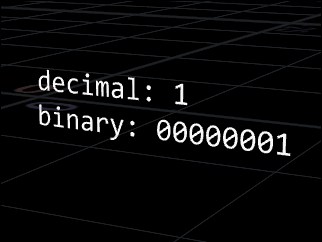 Download scene: decimal_as_binary_text.hip
Uses tricks from these 2 posts:
- https://stackoverflow.com/questions/16926130/convert-to-binary-and-keep-leading-zeros-in-python
- http://forums.odforce.net/topic/13772-font-sop-python/?do=findComment&comment=86985
For loop recursive clip subdivide
 Download scene: recursive_subdivide.hip
cops channel merge
Vdb clip slices
 Download scene: vdb_clip.hip
Curve unroll
 This was the first pass rough version, I cleaned it up and made a longform tutorial: CurveUnrollTutorial.
<s>Download hip: curve_unroll.hip
I can't post this in the regular wiki until I understand it properly, its all a little delicate and hard coded. The idea is to measure the angle between each point and store that as an attribute. Then in another wrangle rotate each primitive by that angle to flatten out the shape.
The tricky bit is that for prim 5, it has to be the accumulated rotations of primitives 0 1 2 3 4. Plus, to make it interesting each prim has to have its rotation timing staggered to get this unroll effect to work. Plus plus, its a mildly tricky dance where the rotation has to be done by moving each prim to the origin, but then put back at the right place where its the position of the accumulated rotations.
If I don't think about it too much I can recreate it from scratch, but if I get it wrong, its lots of random stabbing, swapping the order of code lines, frustration. One day I'll revisit it and try to properly understand it (or come up with a cleaner implementation), but until then...
Original odforce thread here : http://forums.odforce.net/topic/31600-spiral-unrolling-rolling-animation/?tab=comments#comment-174963</s>
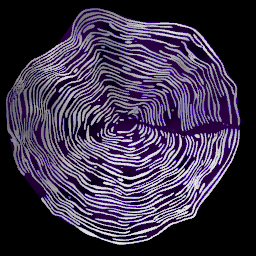
Purple Trails
Download file: purple_trails.hipnc
Pig sphere deform
Download file: pig_sphere_deform1.hipnc
Sphere plot motion trail
Download file: plot_motion_path.hip
Skeleton from edge transport
![]() Download scene: skeleton_edge_transport.hip
Download scene: skeleton_edge_transport.hip
Metaball bevel
 Download hip: metaball_bevel.hip
Video stipple
Inspired by this cool reddit post.
https://media.giphy.com/media/McZukVwwHrtZ98oW8C/giphy.gif
Download hip: stipple.hip
Steel wool
 Download hip: steel_wool.hip
Chaser lights
Download hip: chaser_lights.hip
Projection setup
Moved to Houdini_Lighting_Shading#Projection_setup
Curve bend
 Download hip: curve_bend.hipnc
Setup using the hair guide process node to do the bend per curve, and some fiddly bits to add a straight section before and after the bend.
Pops from points
Download hip: pops_from_points.hip
Mops page turn
 Mops is cool. The falloff node is super fun, makes setting up a page flip effect like this a breeze.
Download hip: mops_pageturn.hip
Wire tree
 Download hip: wire_tree.hip
Or a much simpler way using a sweep: wire_tree_sweep.hip
Cabbage growth
 Download hip: cabbage_growth.hip
For loop in pairs
 Download hip: forloop_inpairs.hip
Volume from image sequence
- Download hip: volume_from_images.hip
- Download hip, update to convert cops output to correctly named vdbs: volume_from_images2.hip
Metaball lavalamp
- Download hip: metaball_lavalamp.hip
RBD mini planet
 Download hip: rbd_mini_planet.hip
Glowy semitransparent particles
![]() Download hip: pops_glowy_semitransparent.hip
Download hip: pops_glowy_semitransparent.hip
Embedded mp4 test
Heightfield image processing
Download hip: hf_cops.hip
Tetris block divide
Quick sketch inspired by this: https://www.instagram.com/stories/highlights/17870206901066985/
 Download hip: sops_tetris_divide.hip
Bend hair with noise
Use a bend guide process, set direction from whatever attribute you want (this is using skin N), whatever bend angle you set will be applied along the full length of the fur.
Download hip: hou13_hair_curl_noise_root_to_tip_me.hipnc
Transfer Cd to points
Download hip: pops_transfer_cd_from_colliders.hip
Distort texture with direction and strength inputs
Download hip: distort_vop.hip
Generate 2d noise in uv space, use that for direction, generate 1d noise, use that as strength. Add that to the input driving a texture (eg the uv or pos input on most vops), that will distort the texture.
This is built in lops for the speed of feedback, but would work in mantra too. Other renderers would require implementing in their own native nodes, but the idea would be the same.
Tattoo bake
 Download hip: tattoos.hip
Viewport updates of textures can be flakey, can occasionally help to run Renders -> Update Textures from the top menus to refresh (until Houdini crashes)
Kinefx parent hands to object
 Download hip: kinefx_hands_follow_object.hip
Using N and up from points on the box, copied onto the hand controllers, then with little compensation corrections done with a rig pose before feeding into a FBIK solver.
Pops advect by volume curl noise
Download hip: pops_advect_curlnoise.hip
Veil Fungus
 Download hip: veil_fungus.hip
Volume FFT
 Download hip: sops_volume_fft.hip
Kinefx Smooth Motion
Via this reddit post: https://www.reddit.com/r/Houdini/comments/11uyo8j/kinefx_smoothing_out_kinks_of_motionclips_through/
Download hip: debug_kinefx_smoothing_fix.hipnc
Map baker with displacement and normals
 Left is 400k, right is 1k with normal map.
Download hip: disp_tests_me.hiplc
https://www.reddit.com/r/Houdini/comments/14ek9zj/workflow_to_bake_displacement_map/
Voronoi fracture tube distort
 Download hip: voronoi_tube_distort_v02.hip
https://www.reddit.com/r/Houdini/comments/14xtbas/trying_to_stretch_voronoi_fracture_along_polywire/
Colour quantize
https://www.reddit.com/r/Houdini/comments/15wn7of/limit_attribute_values_to_a_defined_set/
Download hip: colour_quantize.hip
Hands
https://www.reddit.com/r/Houdini/comments/17c1lhb/group_of_of_hands_simulation_need_to_know_if_it/
Download hip: forloop_hands_v01.hip
Walking monster
https://www.reddit.com/r/Houdini/comments/17pfevd/procedural_walking_monster_can_only_walk_on_flat/
As the other person mentioned, the main fix was the midpoint. My lazy thinking was 'well, if I take the foot position, then move it in the direction of the normal from the ground, thats a good place to put the knee'.
The plane already had normals, as did the scatter points. The copy-to-points by default will intentionally NOT copy this onto the target geometry. I went into the part where it decides what attributes it'll copy, by default it has ^N in there, removed it.
Now the ground points have @N, so the midpoint can be calculated as
vex
pos_mid = feet_pos+(N*.3);pos_mid = feet_pos+(N*.3);There was some tweaking here and there (mainly the hero point anim drifted way too far from the ground at the end of the shot, so I lowered it), but that should be enough to get you going.
Download hip: walking_Monster_fix.hip