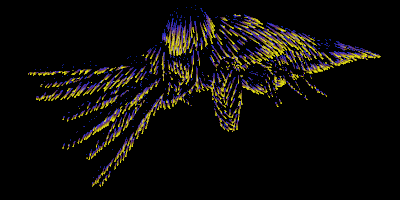
Appearance
Hair and Fur
Massive thanks to this years brave students at UTS ALA for coming on this journey with me, in particular Liz Hadenfeld. Shout-outs also to Nathan Barrett and Beau Parks. Also thanks to Houdini hair expert Beck Selmes for convincing me the tools weren't as tricky as they looked.
Overview
Pleasingly, at its core the hair tools are just clever ways of copying lines to scattered points, and having deformers for those lines.
Less pleasingly, the default workflow pushed by sidefx is very seperate object container heavy, with some distinctly un-houdini behaviors.
Pleasingly again, you can bypass all that stuff and just run it all as a straight sop workflow, and its fine and fun to work with.
So, you have a character mesh, and you want to generate hair. The workflow is to generate low-res guides, groom the guides, then generate hair.
- Hair gen sop (simple mode to generate guides) - By just giving it the char mesh with no other inputs, and low density, this is used to generate guide curves. Peek inside, its ultimately a copy-to-points driven by a line and a scatter.
- Guide process sop - An uber curve deformer. This expects at least 2 input (the guide curves and the original skin), and has ways to do most of what you'd want to do to hair, in a procedural way. Set length, curl, flow along the skin surface, add noise. Almost all of those operations can be driven by a single slider, or attributes on the curves, or attributes on the skin, or by a map, or masked through other attributes. Super powerful. Chain lots of these together to generate your groom.
- Hair gen sop (generate final hair)- this time with 2 inputs, the guide curves you've just groomed, and the skin, this time you tell it to generate the final hair render count, using the guides as an influence. This also has an appearance tab to set width, colours etc.
Why I don't like the default workflow
For the same reason I don't like autodopnets.
It expects you to make at least 3 high level objects, your skin, your guides, your final hair. Lots of jumping in and out of networks ensues, and worryingly/annoyingly, has a new obj node paradigm; the nodes have 2 ins and 2 outs; the first is for parenting, the second is for tunneling sop data (skin and guides) from one to to the next.
It also uses jump targets to skip past the intermediate generate and process nodes, so its super confusing, ick to all of it. I get they're trying to be user friendly to folk coming from other grooming packages, but I think it just complicates stuff. Single sop networks FTW.
Notes
- Put @rest on all the things. The nodes expect it for performance (watch Kai's talk for details), the nodes all issue warnings if they can't find @rest.
- Hairgen gone weird? Check rest. We were getting some very strange final hairgen stuff, realised we were doing tricky stuff to the initial mesh and generating+storing rest too early; The mesh had a t-pose and a coquettish pose, we blendshaped the t-pose to the styled pose, but left the original rest. That result looked like it was trying to generate hairs at the boolean intersection of the 2 poses. Updated rest to match to the coquettish pose fixed it.
- Painting groom direction on hairs is icky. Its non procedural, brittle, easy to lose work if the base mesh gets altered (which if you're doing lookdev, its likely the character base mesh is getting altered and art directed at the same time as your groom). Liz hit upon a great technique to use the comb sop on the base mesh to get a quick direction flow, then use the guide process to generate directions from the skin. Because we have a mesh, when we got mesh updates its (relatively) easy to attribtransfer from the old mesh to the new, and not lose tons of work.
- The hair nodes can be twitchy. I suspect a by product of all the performance improvements, but we've found they can crash houdini, try the exact same operation after a restart, it works fine. Also found they can get stuck caches, and refuse to update themselves even if the input geo has changed. Often not even a bypass/unbypass will fix, but a tiny nudge to a parameter will be enough to wake it up and recalculate
- Group listings often don't auto-update. Really annoying, we'll have groups defined for arms, leg, head etc, the groom tools have drop dropdowns to just work on said groups, but the dropdown will be empty. Type the name in manually, it'll work.
Groom via curve advect
 Download hip: hair_curve_advect.hipnc
I suspect I'll keep adding more versions over time of this setup as I learn more tricks.
This setup uses a very handy trick I picked up from discord, a combination of volume velocity from curves, and guide advect. I make a single line, twist it into a corkscrew, scatter them over the scalp, and convert to a velocity volume. I can then push that velocity onto the groom with guide advect. This has the advantage of manual styling where I want it, but its still very procedural and not locked into a guide groom node.
This setup also shows how to do a a simple vellum sim; the guides are deformed onto the animating head, then have vellum hair constraints applied. To retain the hairstyle and keep it mostly stiff, I have a rule to set stiffness where @curveu is less than 0.3, so the lower third of the hairs are rigid, the rest can flex a bit. Fast to sim, pretty stable.
There's also a few tricks in here for setting hair colour at the geo level. Strictly speaking this should all be left to the shader, but I'm too impatient to wait around for rendering, and for our particular setup we'll be pushing this all out to another app for rendering anyway, so its good practice for us to have the groom be as self contained as possible, with minimal material setup after the fact.
Fur direction from surface gradient
 Download hip: furdirection_from_distance_gradient.hip
Cool trick from Chris Gardener and Jake Rice.
I've often set initial direction for a groom by the double cross product trick; take the normals of your skin mesh, cross product against {0,1,0}, that generates new vectors that swirl left-to-right. Cross product that again, and you get a top to bottom flow. Nice if your mesh happens to conform that way, less nice if it doesn't.
Chris pointed out that you can select a point on the nose, get every point to measure its distance from that point, then use a polyframe to get the gradient of that distance, which is perfect for a groom direction.
Jake pointed out that polyframe is a bit fiddly to use in this way, while the measure sop handles attribute gradients elegantly.
This example puts all that to use. First I boolean the mesh with itself so its all a single surface, group a point where I want the groom to start, then use the edge transport sop to measure distance. The advantage is it's not just distance in a straight line for each point, but its distance along the surface (sometimes called the geodesic distance).
The measure sop calculates the gradient, and stores it in a vector called furdirection. Why? Because if you look at the hair generate sop, it looks for that attribute by default to set direction.
Finally I generate uv's and color based on uvs, to make the groom easier to see. I also used an attrib blur on the furdirection to smooth it out a little.
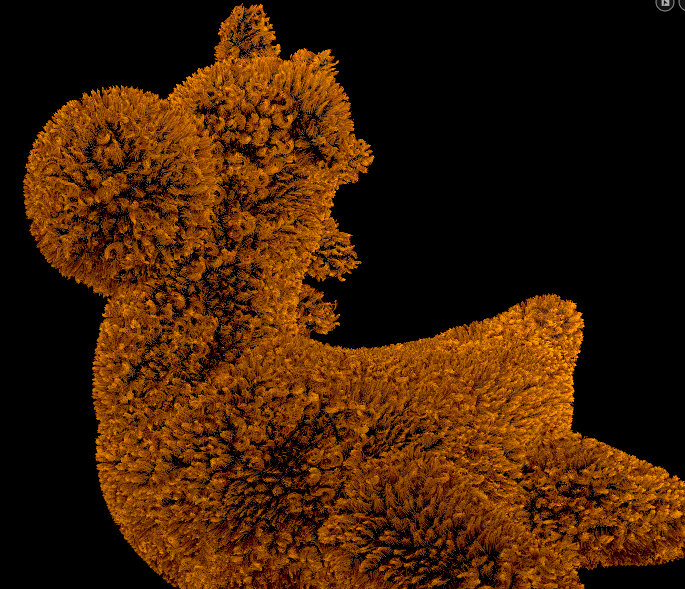
Curly fur
 Download hip: fur_curly.hiplc
Nothing special, just a quick test to see how easy it was to setup. It's easy to setup.
The hairclump sop has a curling tab, used that to get a teddy bear/poodle style groom.
UTSALA alumni and lovely person Phil Billones asked if you can apply a mask. The amplitude and frequency of the curl can be driven in the same way as most groom attributes, so by adding the default it wants, namely @clumpcurlamp crated with an attribute noise, you can get a more natural look:
Download hip: fur_curly_masked.hiplc
Hristo's Hair Help
Hrist was kind enough to share a TON of knowledge on discord, and let me share it here too. This is a raw dump for now, at some point I'll tidy this up into a proper article with pictures and stuff.
I've been diving into grooming a lot lately too. Fundamentally, the problem ways of thinking that come from other packages is that it puts the information on the hairs. This breaks the proceduralism, because hairs change all the time.
It's better when you put the information that defines the style onto other geometry - the skin, guide surfaces, scissor surfaces. These are much more stable
Second - think like a hairstylist and not a hair sculptor helps a lot. You can do things with the hair at rest - meaning:
- starting with straight lines coming out of the skin, looks like a hedgehog.
- Style these with guide process for bends, curls, frizz, wave, length, masks etc
- use vellum to let it fall down naturally.
- Time shift to a newrest frame and use scissor meshes to define areas where the scissors would go.
- Transport the groups down so once its cut it stays cut
<On the wiki earlier is> the trick with the distance to a point you mentioned. There is one more useful thing:
- Take the normal
- And where position x is more than zero, reverse it's X
- This gives youa natural looking split
- Then you can blend between the distance to point direction and the split direction
- Using the depth of the head, so split is at the front, point is at the back, and you blend them as you like them
- Then give the vector an extra push on z at the split area, this gives you how much the hair is pushed back to reveal the forehead
- Define a hairline by using relative height
- Then add a comb, make vel volume from the combed v, and use as guide advect /constrained
And this is our start position groom there - minimal settings, but already looks natural, and you don't start from bald head but from a natural hair.
For long hair with its twists and flows:
- Making some guide shapes, by lines and brushes, but these are not hairs!
- Sweep them so they cover area
- Use the roll and twist controls on the sweep to do the twisting
- Polyframe with v from tangents. Fill them with points with points from volume, and transfer the v
- Make vel volume from these points
- And use with guide advect but this time in the fill velocity volume mode
- This makes hairs grow along the guide shapes, filling out the volume, it's great for long complex structures
On top of this you can do your other styling, and several hair gen levels with decreasing width, guide process so at each level you add ever smaller details. And only at the end some brushing, which you're at peace knowing it will throw away at the next minor change 😉
But that's just the final small tweaks where it's not paying off to be procedural. Everything else is, and as you change all the operations, it's stable.
Then you got your groom
For animation:
We had a client with a very weird setup to get us started, but i think that's coming from the sidefx defaults where there are 'guides' - hate that word by now because people talk as if they are different from the other hairs, which they are not, it's just a smaller number of hairs!
So they had these, simulate them, then on the moving hair, do hairgen which is silly, because it's changing the hairstyle after the animation, and where do these guides come from? they are not optimized for simulation.
So what we did is:
- divide the hair into regions - some is too short and doesn't need sim, just animation
- the rest - reduce prim count first, just by delete N out of 100 so you end up with a smaller number
- resample so you end up with good number of points -
- the harder the hair, the fewer points along the line, this is a very important control for vellum, hard hair is most effectively done with a small point number
- then you apply the animation of your character to the groom - point deform
- and only then you move to simulation
- you've done your vellum configs at rest
- then vellum solver after the animation
Again that's only getting applied to the long hair, the short is only getting the animation from the character with point deform and after the solver you can do some processing, like painting weights to blend between how much the animation blends with simulation - where your sim does unpleasant stuff but the animation is tight, you can blend some of that in.
Gives you good animation curves, and then transfer this motion to the rest groom with all its hairs, using guide deform. It's quick and smart, uses barycentric coordinates at the root to pick up which anim hairs drive which render hairs, and along the hair length uses only these - detailed and fast, unlike doing it with simple point deform
So after you have the animated groom...
To package for lighting
We're using alembics, for rendering with vray/arnold, but even if you render with mantra, haven't figured out how to make bgeo show several primitives at packed disk mode, alembic does. So you build a name for each hair from skin regions, from id%100 for splitting up into parts, and pack using that name.
This gives you the separate prims you'll have access to in lighting, so you can isolate, remove, different shaders etc. Then it's the lighting people's job 😃
Usually hair shaders are not too hassly to set up, last project was vray hair, it's rendering very quick and easy to set up with melanin, hair dye and reflectivity, i think most other renderers are the same.
Voilla, that's your complete, procedural hair workflow!