Appearance
Layering
A big hype point of USD is layering, a magical land where assets, layout, anim, fx, lighting can all work together, combining and overwriting each others work in non destructive ways, it all sounds too good to be true.
At its core its relatively straightforward, but yet again has some cool workflow implications.
To demonstrate this we'll do a mini production example:
Make a set
Lets pretend to be a modelling artist who is placing a few things, and saving this as the set for a film.
- Create a grid
- Append a cube
- Append a rubber toy
- Use a stage manager to arrange this all under /set, give things nice names
- Either use the transform tools built into the stage manager to arrange things nicely or, use an edit sop. Have the cube a little too close to the rubber toy.
- Append a USD ROP, set the default prim to /set, save as $HIP/geo/set.usd
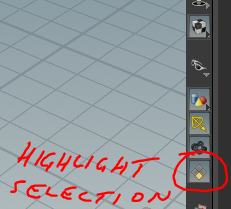
You've probably noticed by now that the viewport will highlight selected prims in yellow. If you don't like this, click the 'toggle highlighting' button in the right stowbar of the viewport, its about 2/3 the way down below the camera icon.
Be a layout artist
Now put on your layout artist hat. Layout artists decide basic blocking for a shot, creating cameras and often adjusting placement of things slightly if required.
- Create a reference node, name it 'set', load in $HIP/geo/set.usd
- Set the primitive path to /shot/set, so we have a top level /shot folder, and the set lives underneath it.
- Append a camera. See that its prim path is /camera/$OS, thats no good. Change it to /shot/camera
- Look through it, lock the viewport, frame it on the rubber toy
- Oh man, that cube. Who put that there? Lets fix it.
- Append a transform lop. Drag the cube from the scene graph to the 'primitives' parameter.
- Adjust the transform so the box is out of the way. That's better.
- Append a USD ROP, save as $HIP/geo/shot.usd, set the default prim to /shot
Be an fx artist
Meanwhile, 4 weeks earlier, you were an fx artist. You were told that there'll be a shot where you have to make the lead character become a cylinder. The shot isn't ready, but can you get started?
- Make a cylinder
- Append a USD ROP, save as $HIP/geo/fx.usd, set the default prim if you want, save.
Jump back to today. You hear sets and layouts have something, can you get your fx ready for the shot?
- Create a new reference node, load shot.usd, set the primitive path to /shot
- Expand the scene graph tree, look for the character mesh. In my shot its at /shot/set/bob/mesh_0
- Right click that prim in the scene graph, choose 'copy path'
- Go to the cylinder node, paste in the primitive path, so that the cylinder now lives at /shot/set/bob/mesh_0
- Set the default prim on the rop to /shot, save
Be a lighter
A lighter will usually have a fixed process for loading the sets, chars, cameras, fx. Lets assume we're doing that here.
- Load the shot; create a reference node, load $HIP/geo/shot.usd, set the default prim to shot.
- Load the FX; append a reference node, load $HIP/geo/fx.usd, set the default prim to shot.
- Append a USD ROP, save this as lighting.usd
Hey look, the rubber toy has changed to a cylinder! The scene graph layout is unchanged, the names of things are unchanged, but we've been able to seamlessly insert fx into the right location in the shot! And lighting isn't even aware of the change made to the cube by layout.
Because each usd is built on references to the previous department, it means that if any department updates stuff, lighting get it immediately, seamlessly.
It's also worth pointing out what's being saved in each of those usd files:
- set.usd has all the geometry in it, is the biggest of all the files
- shot.usd just has a reference to the set, a camera, and an override for the box.
- fx.usd is also tiny, its just the cylinder
- lighting.usd is also tiny, even though it pulls in everything for the shot; ultimately its a collection of references, and a few lights.
There's rules of course, if people change names of things, or where things sit in the Scene Graph then things won't layer properly, but this is the core of how USD layering works. Ultimately its pretty simple, just match names, apply overrides, but its very powerful.
prev: UsdGuide08 this: UsdGuide09 next: UsdGuide10 main menu: UsdGuide