Appearance
Joy of Vex Day 4
chramp, using on attrib components, on time, on reranging outputs
chramp can be a much more direct and visual way to shape things. If you've used the curves tool in photoshop this will be intuitive, if not, I'll need a few gifs. 😃
A channel ramp gives you a little 0-1 xy graph. You can click on the graph to edit the shape of it, with options for if the points on the curve are angular or curved, or stepped, or any combination thereof.
Within your code you tell it a variable that will become the x-axis of the graph, and it will return the corresponding value from the y-axis.
Eg, in its default state its a linear graph; 0 maps to 0, 1 maps to 1, its all clean (note that values below 0 or above 1 get clamped):
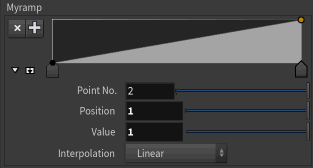
To invert values, you make the graph slope the other way:
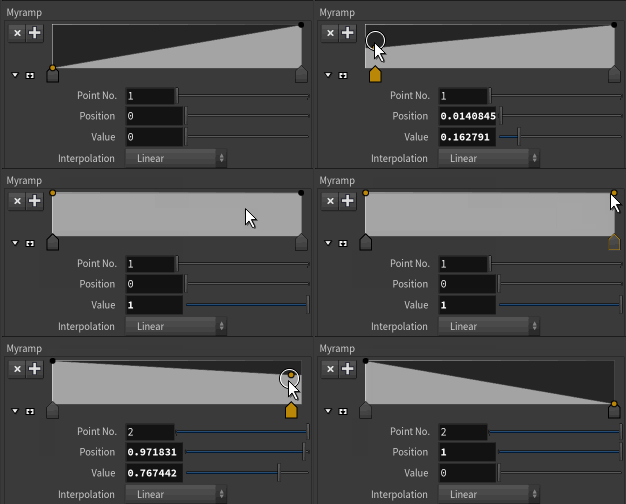
Or you can do a sine wave (well, sort of):
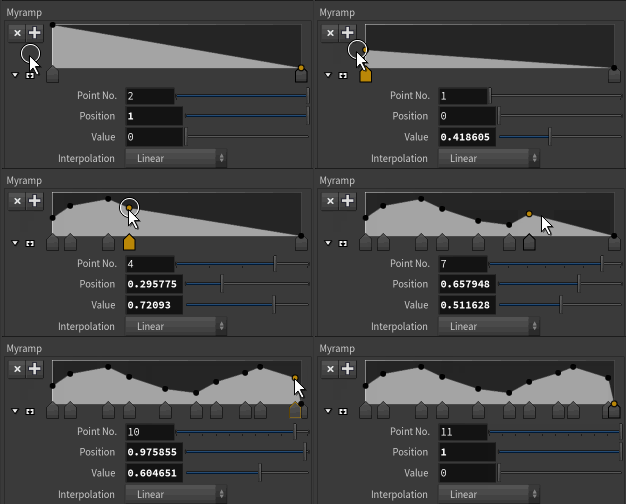
Or random whatevers:
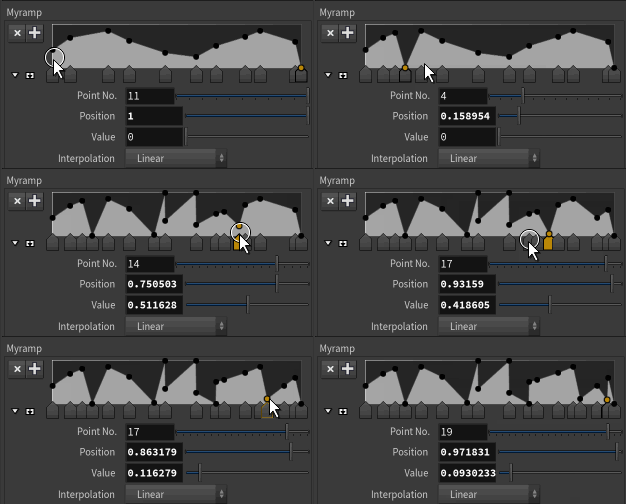
Chramp and waves
Eg, to alter distance from the previous lesson:
vex
 float d = length(@P);
 d *= ch('scale');
 @P.y = chramp('myramp',d);
float d = length(@P);
d *= ch('scale');
@P.y = chramp('myramp',d);So we specify the name of the ramp (myramp, but it could be anything), and what will be used for the x-axis, d in this case.
If you're doing this from scratch, you'll see nothing to start with. Create the parameters with the little clicky button if you haven't already, and start turning up the 'scale' parm. You should see the grid get deformed into a wide ramp, and as you push the slider further, it will form a dent with a raised flat bit around it.
Now have a play! Add extra points into the ramp GUI, see how adding and moving points corresponds to changes in the geometry. There's 3 little buttons in the top-right of the ramp widget, they will flip the ramp left to right, top to bottom, and the gear contains some preset ramp shapes. Play with them all.
Note that the values clamp if you alter the scale slider too much. In previous versions of houdini the patterns would repeat (a lot of older tutorials will assume for this behaviour, watch out for it). Why the clamping?
This is new in 19.5. In previous versions of Houdini when the values feeding the ramp, 'd' in this case, got bigger than what chramp expects (ie values between 0 and 1), it would helpfully 'fold' the values for you into repeating patterns. Now it doesn't.
To fix this we need to explicitly fold the values ourselves. This operation is called 'modulo', which I explain in future lessons. For now, just add this odd percent equals thing, and know that this is what's allowing the waves to repeat.
vex
 float d = length(@P);
 d *= ch('scale');
 d %= 1;
 @P.y = chramp('myramp',d);
float d = length(@P);
d *= ch('scale');
d %= 1;
@P.y = chramp('myramp',d);Add time to the mix (by subtracting it so it moves in the way I expect), plus a scale control, now you have a way to define time based waveforms:
vex
 float d = length(@P);
 d *= ch('scale');
 d -= @Time;
 d %= 1;
 @P.y = chramp('myramp',d);
 @P.y *= ch('height');
float d = length(@P);
d *= ch('scale');
d -= @Time;
d %= 1;
@P.y = chramp('myramp',d);
@P.y *= ch('height');Here's a little demo. See how if I clip the grid in 2, the cross section shows its repeating the chramp shape. By changing the scale (ie width) and the height sliders, I can set how often the ramp repeats, and after that point, can dial in whatever shape I want. Triangle waves, square waves, square waves with soft falloffs, increasing triangle waves, a badly drawn sine wave etc etc This make it very easy to dial in the shape you want.
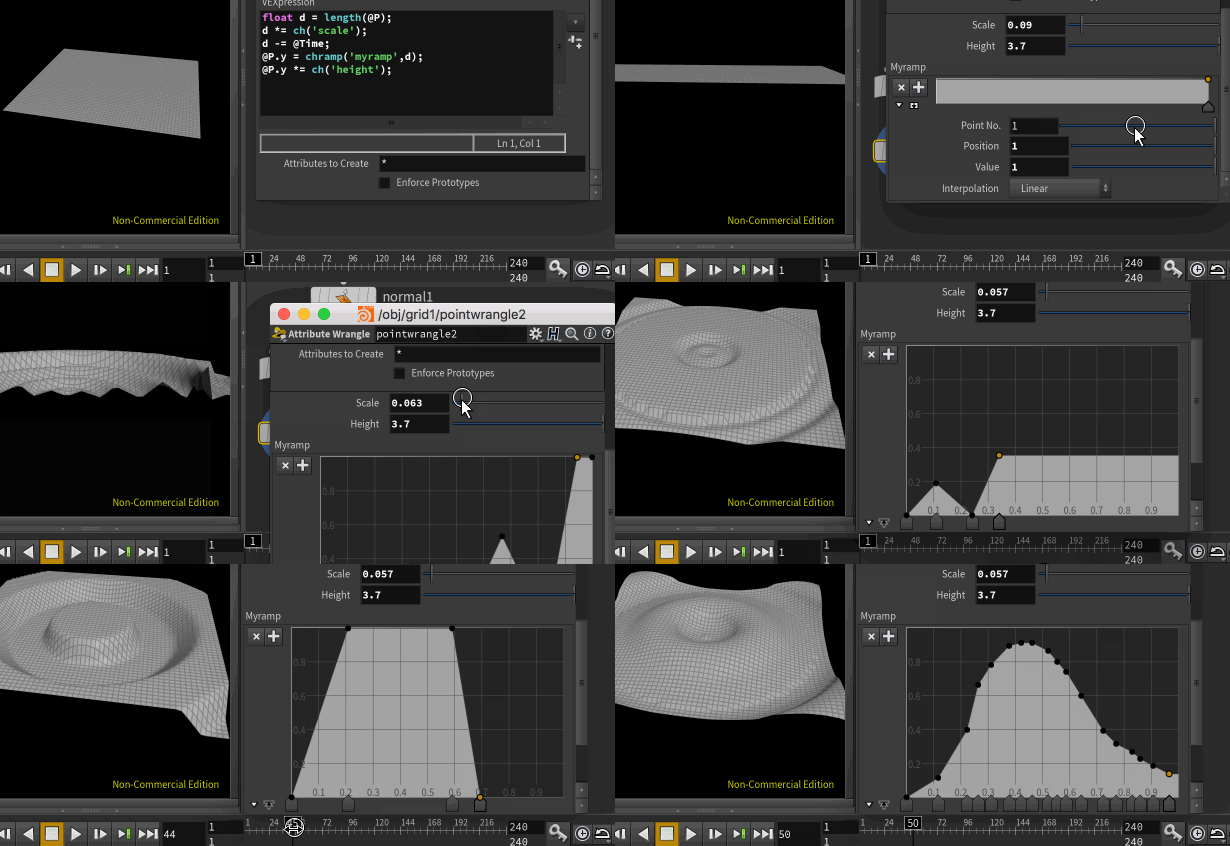
Note that by 'easy' I mean 'easy until you start swearing at the ramp UI'. It's better than it was, again 19.5 added the ability to set values below 0 and above 1, but the rest can be a little annoying to play with. Changing the curve point types to values other than linear can get twitchy, you can't easily copy and paste between 2 different ramps, and there's a million other little irritating issues, and yet.... it's still pretty cool.
While mapping a linear ramp to a value is nice and direct, you shape any input value to any output value. For example, taking the perfect wave generated by sin, and clipping or shaping it to change the result:
vex
 float d = length(@P);
 d *= ch('scale');
 d += @Time;
 d = sin(d);
 d = fit(d,-1,1,0,1);
 @P.y = chramp('myramp',d);
 @P.y *= ch('height');
float d = length(@P);
d *= ch('scale');
d += @Time;
d = sin(d);
d = fit(d,-1,1,0,1);
@P.y = chramp('myramp',d);
@P.y *= ch('height');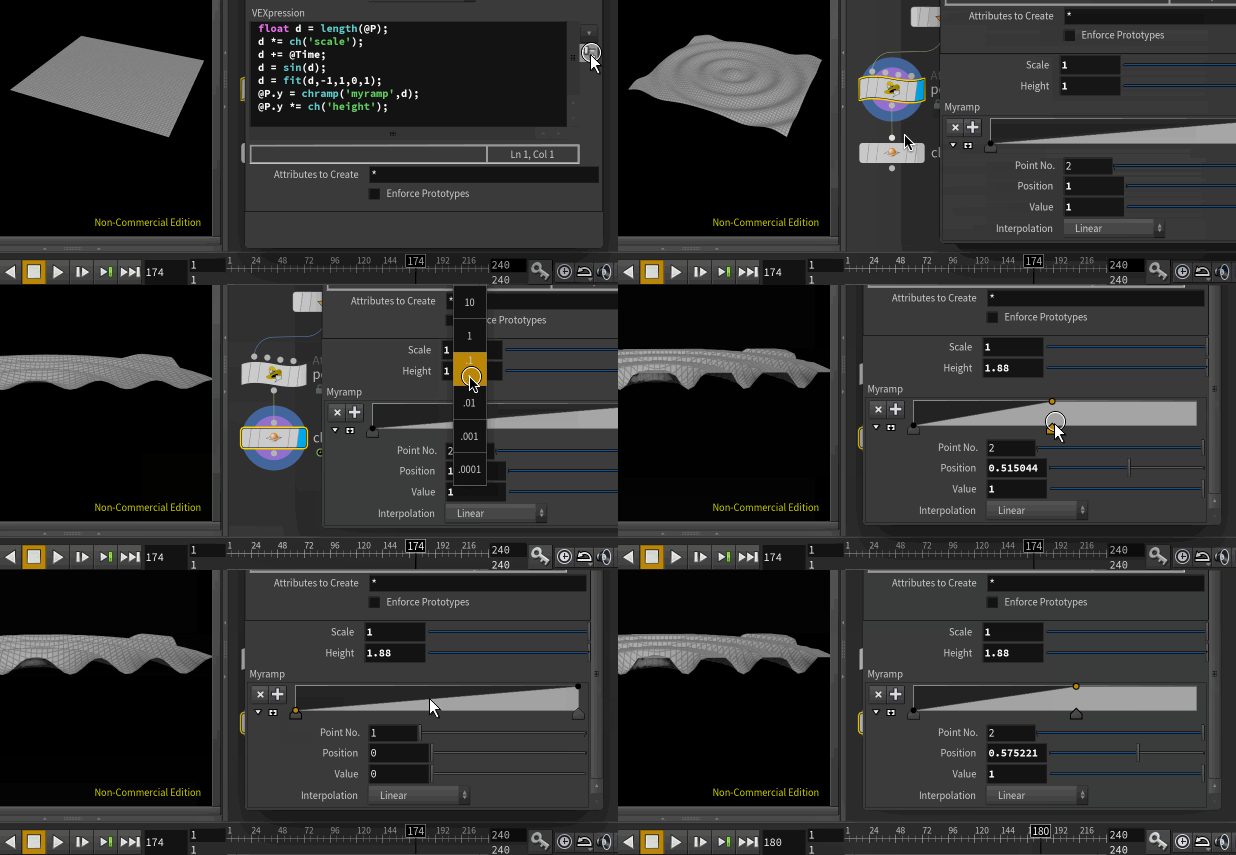
Note that I took the value of sin which was between -1 and 1, and fit it to go between 0 and 1. Chramp is less confusing when the input is kept in this range. In fact a lot of vex functions expect this, when values are put into the 0 to 1 range they're called normalized values. This is especially important for vectors, which we'll get to in later lessons.
Exercises
- Create sawtooth waves, triangle waves, square waves
- Affect colour in this way to make a shape pulse with pleasing colours
- Do this to the different colour components at different rates, get trippy
- Affect colour and position in different ways, find the most interesting way to break the pig. Keep all the effects controllable from channels.
prev: JoyOfVex03 this: JoyOfVex04 next: JoyOfVex05
main menu: JoyOfVex