Appearance
Hierarchy manipulation
Quick recap of what we've covered so far:
- USD is a geo cache format
- USD is a reference/assembly tool
- USD is a transform manipulator
The next thing we'll look at is hierarchy manipulation. Say you were in Maya, you can use the outliner to parent stuff, group things, rename, impose some structure so that you don't just have a big dumb flat list of shapes and transforms.
With USD your intuition would be to try this with the Scene Graph Tree. It doesn't work that way, its like the geometry spreadsheet in that it's more for viewing than for editing.
Instead do this:
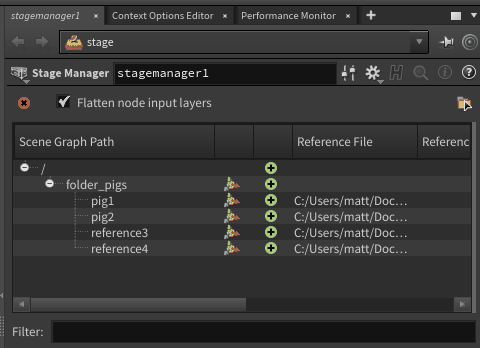
- Tab in a Stage Manager
- Put it after the edit node
- Look at the parameter pane, expand out the tree, you can see its a copy of the Scene Graph Tree
- This is editable, and can be used similar to the maya outliner. Lets try.
- Double click where it says 'reference3', change it to 'pig3'.
- Middle mouse drag 'reference1' onto 'pig3', it is now a child. Notice the Scene Graph Tree is updating too.
- Click the green plus next to the top / indicator. This will make a new empty folder, name it 'my_pigs'
- Shift select all the other nodes, drag them under my_pigs, they're all parented under it now.
Handy! If you've been using Houdini for a while you might've forgotten about dealing with hierarchies like this, but its pretty important for most other packages, and its good scene management hygiene when you get into massive shots.
The stage manager is essentially an edit sop for the scene graph tree. All your manual edits are recorded, and they can be inspected by clicking the little vertical sliders button, 'show/hide parameters' at the top of its parameter pane. You'll be presented with a tab for each edit operation, which you can delete or edit further if you choose.
Again save it out, load it back in, see that the hierarchy is maintained, and will appear this way if you were to load that usd in another application.
Procedural Hierarchy Manipulation
It's guaranteed that any smug Houdini tutorial is going to throw the word 'procedural' in at some point. Everything shown so far could be done in other applications that support USD. Lops gets interesting when you see that a lot of the tricks you do in Houdini for geometry in Sops, can now be applied to hierarchies in Lops.
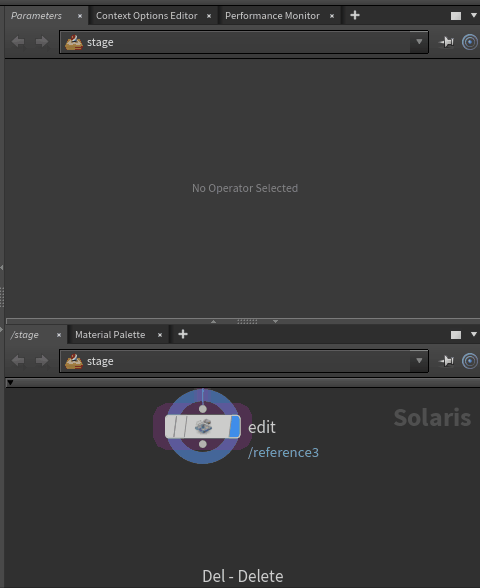
In fact, you've already used some without realising it. The reference node has $OS at the top of its parameters (well, it did when I asked you to change it earlier). This is used as the name to put in the hierarchy. That's why you can keep duplicating and attaching references, and they each get a unique name in the scene.
But how about this: Say you were in maya, and you know you want to put your static geometry at /asset/geo/static/. You'd need to go to the outliner, ctrl-g, rename to 'asset', select it, ctrl-g, rename that group to 'geo', select, ctrl-g, rename to 'static', then finally drag your geometry into that outliner location.
Now lets do that in Lops:
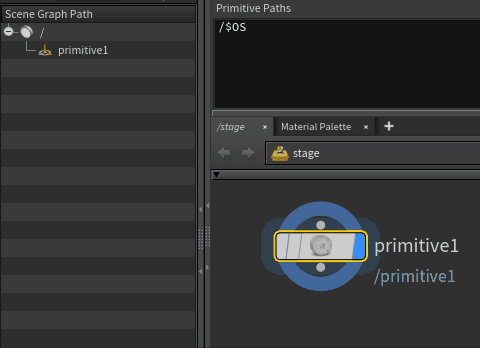
- Create a primitive lop, display it.
- The defaults in the parameters is $OS, and in the Scene Graph Tree its made primitive1 under the top level folder.
- Change $OS to '/asset/geo/static/'
- Look in the Scene Graph Tree. Instantly, you've made the outliner folder structure you're after.
Handy eh? You could mix $OS in there too, or hscript, or system variables for $SHOT or whatever. Neat.
On to part 4...
prev: UsdGuide02 this: UsdGuide03 next: UsdGuide04 main menu: UsdGuide